Overlay glasses
The overlay glasses provide a powerful way of displaying information to the user, be it as a heads-up display or an in-world augmented-reality system.
| Module: |
plethora:glasses
(view methods)
|
|---|---|
| Usable in: |
|

Usage
You’ll notice most other modules have a “Basic Usage” section. Oh boy, not here. The overlay glasses are one of the more complex parts of the mod and, when mastered, the incredibly powerful. You can create ore scanners, base monitoring programs, or even run a shell without having to open a GUI.
Firstly, it’s worth noting that the overlay glasses only work in the neural interface. The advanced holographic projector needs to be as close to your eyes as possible, so you might as well wire it into your brain while you’re at it.
Unlike ComputerCraft’s term and paintutils API, the overlay glasses operate on the idea of “vector
graphics”. Instead of saying “set these pixels to red”, you create shapes and set properties on them. We’ll start off
doing this by getting hold of the 2D canvas and drawing a square:
-- Get hold of the canvas
local interface = peripheral.wrap("back")
local canvas = interface.canvas()
-- And add a rectangle
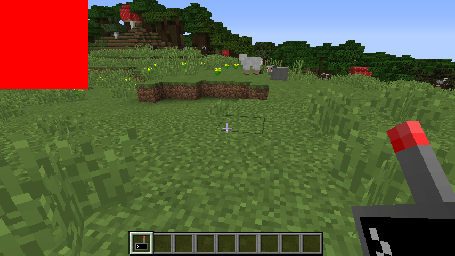
local rect = canvas.addRectangle(0, 0, 100, 100, 0xFF0000FF)

There’s a couple of things which stand out here:
- Our call to
.addRectanglereturns an object, which allows us to change properties at a later date. Why not call.getDocs()on it to find out more? - We pass in 5 arguments, the first 4 are x, y, width and height. The last is an optional colour.
-
The glasses doesn’t use CC’s
coloursAPI, but instead allows specifying RBGA colours. If you’ve done any web design, you’ll be familiar with RGB, where red is represented by#FF0000. This is much the same, but you add an extraFFon the end to specify transparency.If this gets a little too much, you can always use
.setColour, which allows specifying individual red, green, blue (and alpha) channels.
I wrote the mod, and I’ll be the first to admit this isn’t very impressive though. Let’s flesh it out a bit:
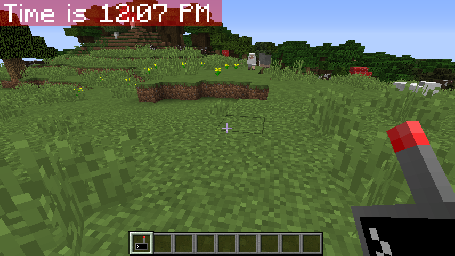
rect.setSize(250, 30)
rect.setAlpha(100) -- Let's make this see through

local text = canvas.addText({ x = 5, y = 5 }, "")
text.setScale(3)
while true do
  text.setText("Time is " .. textutils.formatTime(os.time()))
  sleep(1)
end

Now we’re cooking with gas! We’ve now got a pretty ugly clock up and running in the top left of our screen. One
interesting thing to note in the above is how we pass in the position to .addText. Many constructors take positions as
tables instead - for these you can either pass { x = 5, y = 6 } or just { 5, 6 }. Any additional fields will be
ignored, which is always nice.
Of course, you’re not limited to using text and rectangles. I’d recommend checking out the method reference to see what other objects you can use.
Putting things in boxes
One feature of the glasses it is worth exploring is the ability to group items together. One effectively creates a whole new sub-canvas, where you can add items, and then move them around to your heart’s content. Let’s take our previous example, and spruce it up a bit:
local canvas = peripheral.wrap("back").canvas()
canvas.clear() -- Get rid of our previous clock

local group = canvas.addGroup({ 0, 0 })

-- Look, we add items to our group instead
group.addRectangle(0, 0, 240, 30, 0xFF000064)

local text = group.addText({ 5, 5 }, "")
text.setScale(3)

local x, y, dx, dy = 0, 0, 5, 5

-- Compute the dimensions we can move within
local width, height = canvas.getSize()
width = width - 240
height = height - 30

while true do
  -- Bounce the group around the canvas
  x = x + dx
  if x < 0 then x, dx = 0, -dx end
  if x > width then x, dx = width, -dx end

  y = y + dy
  if y < 0 then y, dy = 0, -dy end
  if y > height then y, dy = height, -dy end

  group.setPosition(x, y)

  -- And update the time
  text.setText("Time is " .. textutils.formatTime(os.time()))

  sleep(0.05)
end

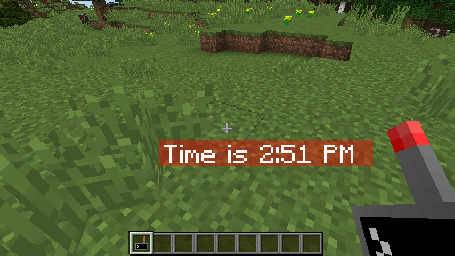
While that was rather dense code, for which I apologise, I hope you can appreciate the end result! Not only can we move our clock around on screen without issue, we’ve recreated a screensaver from the days of old.